Pages

Saturday, July 31, 2010

Fool Proof Sponge Cake

Got this recipe from Baking Illustrated. Soft, vanilla-y, spongy, light, milky, buttery, eggy in a good way...what did you say? Your life is still not complete? I'm sorry, my ears really do trick me these days. Speechless? Ah, now that's much better.

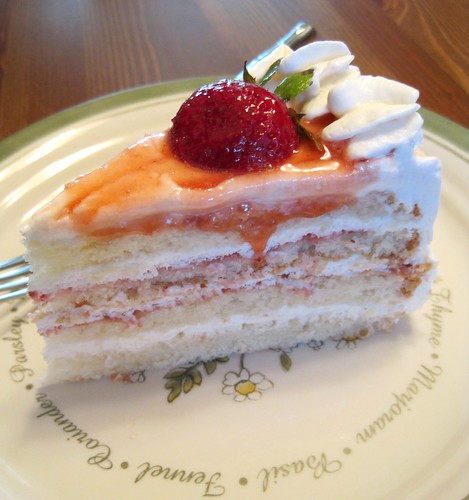
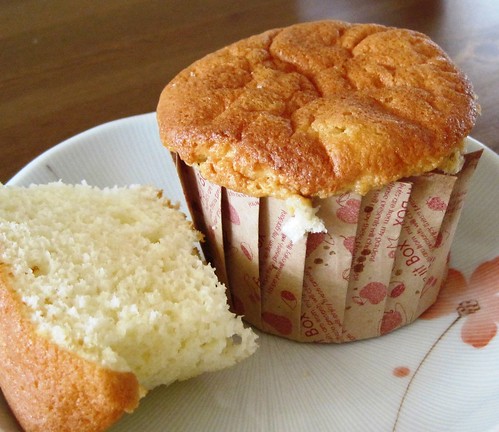
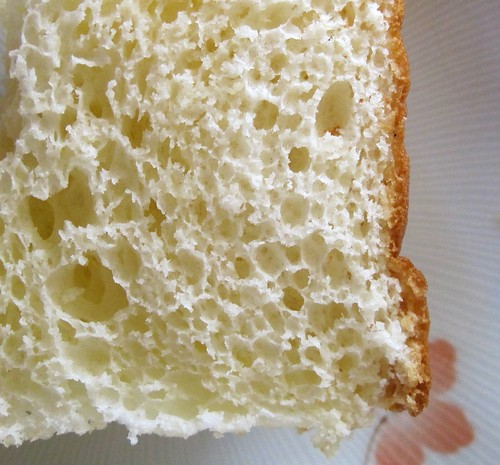
Foolproof Sponge Cake

1/2 cup cake flour (2 oz)
1/4 cup all-purpose flour (1.25 oz)
1 teaspoon baking powder
1/4 teaspoon sea salt
3 tablespoons milk
2 tablespoons unsalted butter
1/2 teaspoon vanilla extract
5 large eggs, at room temperature
3/4 cup granulated sugar (can probably decrease to 2/3 cup if you dislike sugar)
1/4 teaspoon cream of tartar

Adjust an oven rack to the lower-middle position and heat the oven to 350°F (175°C). Grease two 8-or-9-inch cake pans and cover pan bottoms with rounds of parchment paper or use paper baking cups.

Whisk/sieve the flours, baking powder, and salt together in a medium bowl and set aside. Heat the milk and butter in microwave on low power just until the butter melts. Add vanilla extract; keep the mixture covered and warm.

Separate the eggs, placing the whites in a large, oil-free metal mixing bowl and reserving the yolks in a small bowl. With hand-held electric whisk, beat the whites on medium-low speed until foamy. Gradually add 6 tablespoons of the sugar and the cream of tartar and continue to beat the whites to soft, moist peaks.

Beat the egg yolks with the remaining 6 tablespoons sugar on medium-high speed until the mixture is very thick and turns a pale lemon color, about 5 minutes. Scrape beaten yolks onto the whites, but do not mix.

Sprinkle/sieve the flour mixture over the egg mixtures and fold gently with a large rubber spatula until barely combined, 12 strokes if you're lucky. Make a well in one side of the batter and pour the melted butter mixture into the bowl. Fold gently with a large rubber spatula until the batter shows no trace of flour and the whites and yolks are evenly mixed, about 8 strokes. Also make sure that you have incorporated the butter into the mixture. There should not be visible grease/oil as you pour the mixture into the cake pans.

Immediately pour the batter into the prepared pans or scoop into the paper cups. Bake until the cake tops are light brown and feel firm and spring back when touched, about 16 to 18 minutes for 9-inch cake pans and 20 to 22 minutes for 8-inch cake pans.

Cool completely on racks. Run a thin knife around the inside of the cake pans and then invert them onto the racks (or onto cardboard rounds or tart pan bottoms) to release the cakes from the pans. Remove the parchment paper.

Thursday, July 15, 2010

Strawberry Almond Genoise Layer Cake


Baked this for our cousin, Bonnie, for her 23rd birthday! Happy birthday, Bonnie.

It's a vanilla genoise cake, baked in two 8-inch pans, each split into two and soaked with almond vanilla syrup. The cake is filled and frosted with a whipped mascarpone cream and cream cheese frosting with fresh strawberry coulis on the middle two layers, and is decorated with chantilly cream, strawberry coulis, and fresh strawberries and toasted almond slivers. Will post the recipe soon!

Wednesday, July 14, 2010

Kuromame


Our mom made these delicious Japanese style black beans, cooked in a pressure cooker with soy sauce, sugar, baking soda...and maybe some other secret ingredients. ;) They have a texture like mochi or sticky rice crossed with the perfect chestnut, and impart a sweet, savory, earthy black bean flavor. The beans in this photo were made from a variety imported from Japan, called Tanba Kuromame - I think they were $12 for about a handful. (...so ask your friend with big hands to buy them for you)

Sunday, July 11, 2010

Almost The World's Best Popovers


Why almost? Well, first the pros:
1. They are HUGE
2. The crust is nice and golden and crispy
3. The inside is moist, tender yet chewy, and custardy

What could make them better?
1. A sprinkling of cheese on top
2. Slightly less salt
3. We can live with huge, but we will live for ginormous (maybe turn the heat up to 500 next time)

After seeing Tyler Florence's favorite appetizer, giant cheese popovers, we were bitten by the popover bug and just needed to try making some. The guy on TV filled his custard cups all the way to the brim for maximum height, so we tried that but ran out of batter so we made four normal popovers, a midget, and an invisible one.

The key, according to Cooks Illustrated, is to start the popovers baking in a preheated pan with a little bit of hot oil in the bottom. The oven must be very hot initially - 450 degrees, and the pan should be set at the lowest possible rack to allow for maximum rise without burning the top. Later the temperature is turned down to avoid burning the top. In addition, the batter should be whisked until smooth to ensure ample gluten development, and then allowed to rest for 30 minutes for the gluten to relax and loosen, enabling the internal air pocket to push the doughy structure to greater heights. If you are still awake to hear this, they were delicious!


special equipment: 1 popover pan

1 cup whole milk
2 large eggs
1 cup all-purpose flour
1/2 teaspoon salt
2 tablespoons butter, melted

5 teaspoons vegetable oil

In a blender add the first four ingredients putting the liquid at the bottom. Blend on a low speed until smooth, about 15 seconds. Add melted butter and blend for an additional few seconds. Let the batter rest for 30 minutes before baking popovers.

While the batter is resting, 1 teaspoon oil to each cup and put the pan in the 475 degree oven. Remove the hot pan and evenly divide the batter among the five cups. Immediately return the filled pan to the oven and bake for 20 minutes at 475 F. Do not open the oven during these first 20 minutes. Rotate the pan and reduce the oven temperature to 350 F. Bake for an additional 15-20 minutes or until popovers are nicely browned.

Enjoy hot out of the oven with jam, sweetened condensed milk thinned with soymilk, pesto, or pastry cream.

3-Ingredient Chocolate Cake


I did not have high hopes for this recipe, which we discovered in The Great Book of Chocolate by David Lebovitz (which is an awesome book, highly recommended). It has three ingredients and not an ounce of fat, but with our recent ice cream craze, we had a ton of egg whites sitting in the fridge begging to be used, to fulfill their lifelong desire to become a delicious dessert.

This cake is not meant to rise a ton because it doesn't have any flour for structure, but it will still be light. It's kinda like a souffle. When I first tried a bite directly out of the oven, I thought it was disgusting - like a paste of fatless bitter chocolate. So we suffocated the cake in plastic wrap and banished it to the fridge, where it spent the next few nights in darkness, accompanied only by some cold apples in the fruit drawer.

One groggy morning while groping around the fridge for some grub, we subconsciously grabbed the chocolate beast and sliced it into thin slices. Topped with some homemade pastry cream, it was amazing! The bitter fatless chocolate perfectly complimented the creamy, rich, vanilla-y silky smooth cream. And surprisingly, the cake was very moist. The intense bitter edge mellowed out as the cake sat in the fridge, and the result was still very chocolately yet not so sour. There are a few criteria for enjoying this cake:

1. You must like dark chocolate, not just milk chocolate.
2. You must have an open mind - don't think "rich chocolate cake." Think "exotic souffle-like dessert!"
3. You must be desperate to get rid of egg whites.
4. You must resist the urge to eat the cake right out of the oven. The chocolate needs time in the fridge to mellow out and for the flavors to blend.
5. You should serve the cake with something creamy, sweet, and vanilla-y. (whipped cream, pastry cream, creme anglaise, mascarpone mousse...you get the idea)

Considering it's so easy to make, and is relatively healthy, and tastes good, we highly recommend you try it.

3-Ingredient Chocolate Cake
3/4 cup cocoa powder
1/2 cup plus 2 Tbsp (135 g) sugar
7 egg whites, room temp

Sift and whisk cocoa and 1/2 cup (100 g) sugar. Whip egg whites gradually with 2 Tbsp sugar until soft peaks. Fold the two together gently in 3 batches. Bake in a 9-inch springform pan with pan of warm water on the rack below (or do a waterbath with a pan that doesn't leak). Bake 35 minutes. Cool 5 minutes, remove from pan, and cool completely. Wrap in two layers of plastic wrap and stick it in the fridge overnight (for best flavor, 36 hours).

Saturday, July 10, 2010

Strawberry Stracciatella Ice Cream


Now we hate to brag, really - it is such a difficult thing to do. But this ice cream seriously is delicious beyond belief, so before you make it, be sure to mentally prepare yourself for the world's best strawberry ice cream. This recipe was adapted from Cook's Illustrated, and makes a smooth scoopable ice cream that is seriously scrumptious.

We bought fresh strawberries and hand picked only the ripest, reddest berries for this ice cream, sacrificing the underripe unfortunate ones for the dreaded fate of snacking on by merciless pearly whites and not-so-pearly whites. The egg yolks are organic, and the heavy cream and whole milk are organic and not ultra-pasteurized and fresh from Straus Creamery, so they had a sweeter taste than ultra-pasteurized cream (Or at least, we tricked ourselves into believing so!). We didn't have vodka so we soaked the berries in rum, and they did not freeze up icy hard, but stayed soft yet chewy. Served with 2% Greek yogurt and mint, it's a perfect summer dessert, if I may say so myself!

Strawberry Stracciatella Ice Cream
makes 1 quart unchurned, a mountain churned

16 ounces (3 cups) hulled and sliced very red fresh strawberries
pinch salt
1 1/4 cup (8.75 oz) white sugar
1 1/4 cup organic fresh whole milk
1 1/3 cup organic fresh heavy cream
7 large organic fresh egg yolks
1 teaspoon juice form 1 lemon
1.5 tablespoons white rum
1 teaspoon vanilla extract
melted high quality dark chocoalte

1. Toss strawberries, salt, and 1/2 cup sugar together in a saucepan. Mash berries gently with fingers until slightly broken down. Let stand, stirring occasionally, until berries have released juices and sugar has dissolved, 40 minutes.
2. Meanwhile, position a strainer over a medium bowl set in a larger bowl containing ice water. Heat the milk, cream 1/2 cup of the sugar, and the salt in a medium saucepan over medium heat, stirring occasionally, until steam appears (175 degrees). While milk is heating, whisk yolks and 1/4 cup sugar in medium bowl until pale yellow. Whisk half of the warm milk mixture into yolks, slowly, until combined. Whisk milk-yolk mixture into the saucepan and cook over medium heat, stirring nonstop with wooden spoon until steam appears and foam subsides (180 degrees). Do not boil or the eggs will curdle. Immediately strain custard into bowl set in ice-water bath. Cool the custard to room temperature, stirring occasionally to help it cool.
3. While custard is cooling, set saucepan containing berries over medium-high heat and cook 3 minutes total.Strain the berries, saving the juices. Transfer berries to a small bowl; stir in lemon juice and rum or vodka, then cool to room temperature, cover with plastic wrap and stick it in the fridge until cold. Stir vanilla and strawberry juice into cooled custard, cover bowl with plastic wrap, and fridge until 40 degrees or lower, 8 hours or more.
4. Pour custard into ice cream machine canister and churn for 20-30 minutes, until the mixture is moving very slowly and no longer increasing in volume. Add strawberries and juice, and churn for 1 minute. Spoon into a chilled airtight container and drizzle melted chocolate over the top in several layers. Freeze at least 2 hours.